Previously, I covered how Rust can be a valuable multiplatform addition to your mobile codebase.

In this article, I want to share a strong way to get started with Rust for multiplatform, specifically on iOS first. The good news is that this article also sets you up with a library that you can use in Android, or even Flutter! But other platforms warrant their own in-depth article.
Be sure to check out the attached video for the complete, in-depth guide!
Also available on 🎥 Youtube
At the end, you’ll end up with a usable workflow, which is: Update Rust library → Run script → Use a Swift Package in an iOS project.
This Swift package will have Rust code inside, but from the iOS project, you would access it using regular Swift code!
The cool part is that the Rust code will appear as Swift code to the iOS project. So if I were to write fn download_images() in Rust, it appears as func downloadImages() in Swift.
To achieve this, we’ll use Mozilla’s excellent UniFFI, which bridges between Rust and iOS as well as Rust and Android.
FFI stands for Foreign Function Interface. Simply put, it’s a way for two different programming languages to talk to each other.
Note that we could call Rust from Swift without UniFFI and handle the bridging ourselves through a manually written C layer. That works fine for simpler cases, but UniFFI’s killer feature is automatic type conversion. A Rust enum becomes a Swift enum. Same for structs or functions. E.g. If we have a function called make_user() in Rust (snake_case), UniFFI converts it to makeUser() (camelCase) in Swift, and so on.
UniFFI can also generate FFI code for Kotlin and even Python. The idea is to write your logic in Rust once, then have Swift and Kotlin bridging code generated automatically.
How this article works is:
We make a tiny Rust library
We make it work on iOS. You can stop here if you want for a simple setup.
Then, we cover the problems of this basic approach and come up with a new plan.
We make an actual Swift Package that uses the Rust project.
We make the iOS project depend on the Swift package for a smooth workflow.
We update the Rust library to a slightly larger example
Besides just giving you the steps, I am adding a lot of explanations at each step, so you understand what we’re actually doing. Not just “run this command”. This is especially important since bridging between two universes means a lot can go wrong, and there are no real “user-friendly” compiler messages to point us in the right direction.
I’ll also link to all project files and build scripts. Including a great workflow script: Write Rust → Generate Swift Package. This will save you days of debugging.
Okay, let’s get started! First we begin with creating a tiny Rust library.
Check out the Github repository and follow along!
1. Making a Rust project
This might come as a shock, but to use Rust, you first need to install Rust.
We’ll create a library that both iOS (and potentially Android) can use.
For packages and libraries, we’ll use Cargo, which is Rust’s package manager and build system (similar to SwiftPM). When we create our project, we get a “crate”, which is Rust terminology for a package or module.
Let’s call our library switzerland, because this is neutral ground where Kotlin and Swift will have to get along.
UniFFI requires a Rust library, not a command line tool. That’s why we use the --lib flag to create a library crate.
From the command line:
# We generate the rust library called switzerland
cargo new --lib switzerland
# We navigate to the project
cd switzerland
If we look inside the project, we see two files. Cargo.toml and lib.rs.
.
├── Cargo.toml
└── src
    └── lib.rs
The src/lib.rs file contains our Rust code. Cargo.toml is the project manifest, similar to Package.swift (Swift) or build.gradle.kts (Kotlin).
1.1. Writing and compiling some Rust
Let’s add some code to lib.rs.
I recommend using Visual Studio Code to write Rust, but any editor works. Just avoid Xcode.
Replace the contents of lib.rs with:
pub fn neutral_greeting() -> String {
   “Hello from Switzerland. No platform wars allowed.”.to_string()
}
⚠WARNING ⚠: If you are following along, verify if you have proper double quotes, Substack replaces them with different ones.
This creates a public function that returns a String. The to_string() call might look odd, but that’s Rust being explicit about string handling. Notice that Rust uses snake_case.
Let’s compile our Rust code to make sure everything works by running cargo build.
[tjeerdintveen@Tjeerds-MacBook-Air switzerland](main)$ cargo build
    Finished `dev` profile [unoptimized + debuginfo] target(s) in 0.01s
[tjeerdintveen@Tjeerds-MacBook-Air switzerland](main)$
It works! Since we built a library (not an executable), there’s no visible output. That means we need a way to verify our code.
We could use local tests, but I want to share how to add a simple command-line program to test our Rust code quickly.
1.2. Adding a simple command-line program
Create a new folder called examples and add a file called hello.rs:
fn main() {
    println!(”{}“, switzerland::neutral_greeting());
}
This main function prints the output of our neutral_greeting() function from the switzerland crate. The println! macro looks more complex than Swift’s print, but that’s just Rust syntax.
Our project structure now looks like this:
.
├── Cargo.toml
├── examples # <---- Newly added
│   └── hello.rs # <--- Newly added
├── src
│   └── lib.rs
Now, we can run this using cargo run.
cargo run --example helloThis prints
Hello from Switzerland. No platform wars allowed.Perfect! We now have both a library and a separate command-line tool to test it. This creates a nice development workflow.
The examples folder isn’t random, it’s a Cargo convention that allows us to use the —example flag. Examples are for demonstration only (not deliverables), which is why they live outside the src directory.
Next, let’s add UniFFI to generate bridging code for mobile platforms.
2. Adding UniFFI to our Rust project
First, update Cargo.toml (the project manifest like Package.swift) to include UniFFI as a dependency.
Under [dependencies], add:
uniffi = { version = “0.29”, features = [ “cli” ] }Under [lib], add the crate types we need:
crate-type = [”lib”, “staticlib”, “cdylib”]Each type serves a purpose:
lib: Standard Rust library (for tests)
staticlib: Creates .a files for iOS static linking
cdylib: Creates .dylib files (dynamic library) for UniFFI binding generation
The complete Cargo.toml file now looks like:
[package]
name = “switzerland”
version = “0.1.0”
edition = “2024”

[dependencies]
uniffi = { version = “0.29”, features = [ “cli” ] }

[lib]
crate-type = [”lib”, “staticlib”, “cdylib”]
Run cargo build to verify everything works. This first build will be slower as Cargo downloads dependencies and builds these for the first time.
2.1. Creating a UniFFI bindgen binary
UniFFI examines our Rust code and generates bridging code for Swift and Kotlin.
Instead of installing UniFFI’s uniffi-bindgen command globally, we’ll embed it in our project. This ensures everyone uses the same binding generator version.
To use it, we need to create a command-line tool that runs UniFFI.
First, create src/bin/uniffi-bindgen.rs, and add:
fn main() {
    uniffi::uniffi_bindgen_main()
}
Placing a file in src/bin/ enables Cargo to use this as a command-line tool that we can run using cargo run --bin uniffi-bindgen.
This is similar to the examples folder, except that bin tools are actual deliverables that live in the src folder.
The hierarchy now looks like this.
.
├── Cargo.lock
├── Cargo.toml
├── examples # <--- Previous examples folder, outside of src
│   └── hello.rs
├── src
│   ├── bin
│   │   └── uniffi-bindgen.rs # <--- New, inside of src
│   └── lib.rs
Unlike examples, the bin folder goes inside src so that cargo run --bin can find it.
Let’s generate the bindings next.
2.2. Generating Swift Bindings
We need to tell UniFFI what to expose to mobile platforms. UniFFI doesn’t automatically generate bindings for every public function. We must explicitly mark what to export.
In lib.rs, add the #[uniffi::export] macro above functions you want to export, and add uniffi::setup_scaffolding!(); at the top.
// Inside lib.rs
uniffi::setup_scaffolding!();

// This is the macro
#[uniffi::export]
pub fn neutral_greeting() -> String {
     “Hello from Switzerland. No platform wars allowed.”.to_string()
}
If you prefer not to use macros, you can write UDL files instead. See the UniFFI guide for details. I’m sprinkling macros here for simplicity.
Now let’s generate the bindings with uniffi-bindgen:
# Build for binding generation (needs .dylib)
cargo build

# Generate Swift bindings
cargo run --bin uniffi-bindgen generate \
  --library ./target/debug/libswitzerland.dylib \
  --language swift \
  --out-dir ./bindings
Note how we reference libswitzerland.dylib in the --library flag. If your project has a different name (like “shoe”), update this to reference libshoe.dylib.
What happens here is that UniFFI reads the dynamic library (.dylib) file that cargo build generates. Then, UniFFI generates Swift bindings (.swift, .h, and .modulemap files) for iOS integration.
This command creates files in the bindings directory.
Let’s see what was generated:
bindings
├── switzerland.swift # The swift bridging file
├── switzerlandFFI.h # A header file
└── switzerlandFFI.modulemap
Troubleshooting: If the bindings directory is empty, run cargo build first.
If we inspect switzerland.swift, we see it contains lots of generated bridging code, including our public function public func neutralGreeting() that we can call from Swift.
// Inside switzerland.swift
// ... Rest omitted

public func neutralGreeting() -> String  {
    return try!  FfiConverterString.lift(try! rustCall() {                                             uniffi_switzerland_fn_func_neutral_greeting($0
                                             )
                                         })
}
We also have C headers, as well as a module map file, which is a text file that tells the Swift compiler how to treat a C/C++ library as a Swift module.
2.3. What about Kotlin?
You can also generate Kotlin bindings by changing the language parameter from swift to kotlin.
# Build for binding generation (needs .dylib)
cargo build

# Generate Kotlin bindings
cargo run --bin uniffi-bindgen generate \
  --library ./target/debug/libswitzerland.dylib \
  --language kotlin \
  --out-dir ./bindings
3. Building for iOS Targets
We have our Rust code and generated Swift bindings, but we need to compile the Rust library for iOS architectures.
We’ll compile twice: once for devices, once for the simulator, so we can run our code on either architecture.
3.1. Adding architectures
First, we need to ensure the Rust compiler supports the iOS device architecture (ARM).
For that, we use rustup, which is the toolchain manager responsible for managing compilers, tools, and target platforms.
Let’s add support for the iOS (ARM) architecture.
rustup target add aarch64-apple-iosWe also need simulator support, which uses a different architecture since it runs on a Mac.
Veterans may remember using lipo to create fat frameworks. This time, however, we’ll create an XCFramework that automatically picks the correct architecture.
For Apple Silicon Macs (M1, M2, M3, M4, M5, etc.), add this target:
rustup target add aarch64-apple-ios-sim # for simulatorFor Intel Macs, use the x86_64 architecture instead:
rustup target add x86_64-apple-ios # for simulator3.2. Building static libraries for iOS
Now, we’ll build our Rust project for both iOS architectures. We’ll use the --release flag to create optimized libraries that are faster and smaller.
# Build for iOS device
cargo build --release --target=aarch64-apple-ios

# Build for iOS simulator
cargo build --release --target=aarch64-apple-ios-sim
For Intel Macs, compile for x86 simulator instead:
# Use x86_64 simulator instead of ARM64:
cargo build --release --target=x86_64-apple-ios
This guide focuses on the ARM (iOS) architecture from here on.
Note that you can use debug builds for faster compilation by omitting --release. Debug builds compile faster but are often larger and slower at runtime.
I recommend iterating in the Rust project itself using debug builds (tests, examples) rather than constantly rebuilding XCFrameworks for iOS testing.
For production builds and TestFlight, always use --release!
3.3. Inspecting the files
The first compilation will be slow, but subsequent builds are faster.
Rust (and, in general, C or C++ toolchains) generates .a files (among others) in the target directory.
Notice the libswitzerland.a files in both iOS and iOS-sim directories:
  target
├── aarch64-apple-ios
│   └── release
│       ├── build
│       ├── deps
│       ├── examples
│       ├── incremental
│       ├── libswitzerland.a # <-- What we want
│       ├── libswitzerland.d
│       ├── libswitzerland.dylib
│       ├── uniffi-bindgen
│       └── uniffi-bindgen.d
├── aarch64-apple-ios-sim
│   └── release
│       ├── build
│       ├── deps
│       ├── examples
│       ├── incremental
│       ├── libswitzerland.a # <-- What we want
│       ├── libswitzerland.d
│       ├── libswitzerland.dylib
│       ├── uniffi-bindgen
│       └── uniffi-bindgen.d
These .a files are static library archives that contain our compiled Rust code. The .a stands for “archive.”
The bridging code, such as switzerland.swift, uses these .a files and bridges them to regular Swift (or Kotlin).
Next, let’s package these archives into an XCFramework for iOS, so that we can use them in our project.
4. Generating an XCFramework
We’ll package the .a files into an XCFramework. Once we drop this framework into our project, Xcode automatically picks the right .a file for each architecture. That’s the power of XCFramework, so we don’t have to use lipo to create a “fat framework”.
Remember our modulemap file that uniffi-bindgen generated for us?
We have a header file at bindings/switzerlandFFI.h, and Swift uses the modulemap to import it.
However, using this modulemap won’t work yet. To make Xcode detect the modulemap, we need to rename it to module.modulemap. This is an easy step to miss! If you forget, Xcode will complain that it can’t find certain types.
mv bindings/switzerlandFFI.modulemap bindings/module.modulemapNow we can build the framework:
xcodebuild -create-xcframework \
           -library ./target/aarch64-apple-ios-sim/release/libswitzerland.a -headers ./bindings \
           -library ./target/aarch64-apple-ios/release/libswitzerland.a -headers ./bindings \
           -output ios/Switzerland.xcframework
Tip: xcodebuild won’t overwrite existing frameworks, and it might display a message you can miss. Be sure to delete the old XCFramework every time you run this command.
rm -rf ios/Switzerland.xcframeworkHowever, the real challenge here is finding a smooth workflow between Rust and iOS development.
4.1. Catching all the little steps
At this stage it’s cumbersome to work with Rust and iOS, since there are a lot of small steps and they all must go well.
For example, Xcode might say “Can’t find RustBuffer“ because it can’t say “You forgot to rename the modulemap.” Since we’re bridging between languages, errors are often unclear. That’s one of the multiplatform pains.
The process feels fragile. Missing any step (deleting the old XCFramework, building all architectures, renaming the modulemap) results in build errors that are hard to debug.
Also, for iOS we want to build using the --release flag. But that doesn’t produce a dynamic library (.dylib file) for UniFFI. So we need to ensure we run cargo build for UniFFI, as well as two more times for iOS.
At this stage, I recommend packaging it all into a build script to ensure a robust process. At the end of this article, you can find this script and all project files so you can try it out yourself!
Let’s continue by embedding Rust code in iOS. The finish line is in sight!
5. Using the Rust code in iOS
Let’s create an iOS project called Matterhorn (named after the famous Swiss mountain).
We’ll copy the framework and bindings/switzerland.swift file into our project.
Our projects now live side-by-side:
.
├── Matterhorn # <--- iOS app
│   ├── Matterhorn
│   ├── Matterhorn.xcodeproj
│   ├── MatterhornTests
│   ├── MatterhornUITests
│   ├── Switzerland.xcframework # <--- We copied the xcframework
│   └── switzerland.swift # <--- We copied the swift bindings file
├── switzerland # <--- Rust library
│   ├── Cargo.lock
│   ├── Cargo.toml
│   ├── bindings
│   ├── examples
│   ├── ios
│   ├── src
│   └── target
Make sure both the xcframework and .swift files are added to your Xcode project.
5.0.1. Calling Rust code from iOS
Now we can import our library and use our neutralGreeting() function from Rust!
import SwiftUI
import switzerlandFFI // <--- We import our Rust library, or “crate”

struct ContentView: View {
    var body: some View {
        VStack {
            Text(”🇨🇭”)
            Text(neutralGreeting()) // <---- We call our Rust function
        }
          .padding()
    }
}
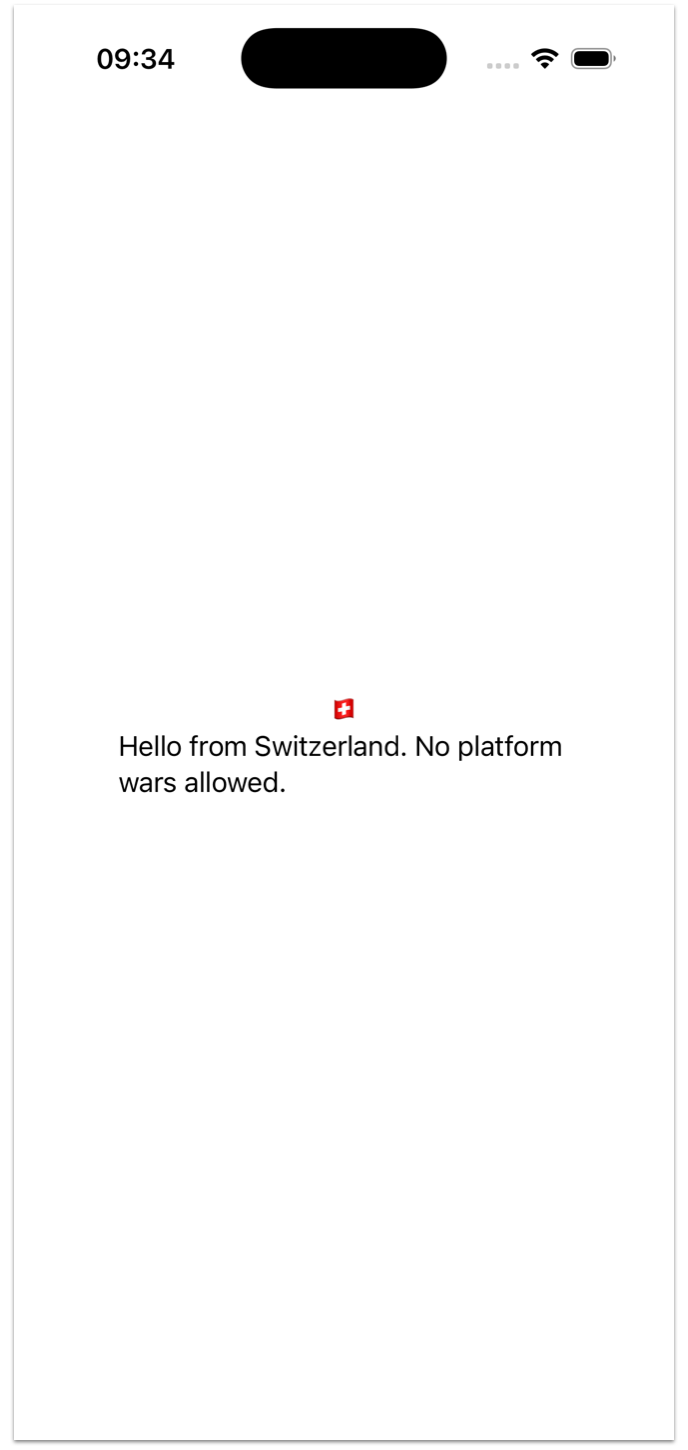
Perfect! It works!
Yes, the statement import switzerlandFFI isn’t capitalized, but we can live with it for now. So far, I’ve realized that if I start capitalizing, I would have to update generated files, and I’m not too excited about that. It feels brittle; if there’s one UniFFI change, then I might update the wrong line. I’d rather just not touch the generated code.
Let’s look at our current setup and review our limitations.
6. Reviewing our current setup
Here’s what we have:
First, we can only import one Rust module this way! This works fine for a single library, but adding another would cause namespace clashes. The problem is our .swift file contains UniFFI-generated types. A second library would create a similar .swift file with conflicting names.
Another issue: we need both the XCFramework AND the Swift file. Ideally, we’d have one nice package, not two files. It works, but feels inelegant (like “here’s your gift… and the bow is separate”).
Another annoyance is that import switzerlandFFI is not capitalized. It’s not a deal-breaker, but your team will keep bringing this up. You don’t want to be known as the “senior developer” who can’t rename a module, do you?
Finally, the workflow is tedious. Every Rust update requires dragging files into Xcode. Wouldn’t it be nice to generate an iOS package that Xcode can automatically pull in?
Good news: we can solve all four problems by creating a Swift package using our Rust crate. Then Xcode can depend on it and update automatically.
7. Creating a Swift package
We’ll wrap everything in a Swift package.
This solves all our problems:
Bundle the Swift file and XCFramework as one dependency
SwiftPM namespaces our module to avoid conflicts
We can capitalize the module name without touching generated files
Xcode automatically pulls in updates (no more dragging files)
The workflow:
Matterhorn (Xcode project) depends on the switzerland-swiftpm package
From the Rust project, we export the XCFramework and switzerland.swift
Copy both files into switzerland-swiftpm
Matterhorn automatically pulls in the updated Rust crate
7.1. Creating the files
We’ll call our Swift package project Swiftzerland… get it? Because we have Switzerland but also Swift, and together… they become… (I’ll see myself out.)
It wraps the Rust crate output (XCFramework and Swift file) into a proper Swift Package.
Let’s go to the command line.
mkdir swiftzerland
cd swiftzerland
swift package init --name Swiftzerland --type library
Looking at our three projects: We now have three folders side-by-side.
.
├── Matterhorn # <--- iOS project
├── switzerland # <--- Rust project
└── swiftzerland # <--- Swift Package of Rust project
Copy the Swift file and XCFramework to the new Swift package:
cp -r switzerland/ios/Switzerland.xcframework ./swiftzerland/
cp switzerland/bindings/switzerland.swift ./swiftzerland/Sources
Inside the swiftzerland folder:
.
├── Package.swift
├── Sources
│   ├── Swiftzerland
│   └── switzerland.swift
├── Switzerland.xcframework
│   ├── Info.plist
│   ├── ios-arm64
│   └── ios-arm64-simulator
└── Tests
    └── SwiftzerlandTests
7.2. Updating Package.swift
Now we’ll update Package.swift to use our Rust components.
The library we’ll expose is called Switzerland, without the ‘f’ (matching the Rust library name). We could call it Swiftzerland, but then we’d be able to import both Swiftzerland and Switzerland from Xcode, which I’d like to prevent.
We’ll limit the package to iOS since we only compiled iOS architectures using cargo build. We could add macOS support, too, but then we will have to build another architecture using cargo build. That’s beyond this article’s scope.
import PackageDescription

let package = Package(
  name: “Swiftzerland”,
  platforms: [
    .iOS(.v13) // <-- iOS only
  ],
  products: [
    .library(
      name: “Switzerland”, // <-- We can use the Switzerland name
      targets: [”Switzerland”] // <-- We can use the Switzerland name
    ),
  ],
  targets: [
    .testTarget(
      name: “SwiftzerlandTests”,
      dependencies: [”Switzerland”]
    ),
    // Binary target for the XCFramework
    .binaryTarget(
      name: “switzerlandFFI”,
      path: “Switzerland.xcframework”
    ),
    // Swift target that wraps the binary
    .target(
      name: “Switzerland”,
      dependencies: [”switzerlandFFI”]
    ),

  ]
)
7.2 Testing our build
Here’s the challenge: I want to build the Swift package independently to ensure it works. But, we don’t support Mac architectures, only ARM and simulator. I could depend on an iOS project to verify the Swift package. But, with cryptic errors and inter-programming-language bridging, I prefer to keep the problem space as small as possible.
That means swift build fails with:
`error: no such module ‘switzerlandFFI’But we can use a little trick from the command line. Let’s specify the iOS architecture explicitly:
swift build --triple arm64-apple-ios --sdk $(xcrun --sdk iphoneos --show-sdk-path)

Build complete! (0.15s) # It works!
8. Using Swiftzerland in Xcode
Now let’s add our Swift package to the Matterhorn Xcode project.
First, clean up: delete the old .swift and .xcframework files, and remove import switzerlandFFI.
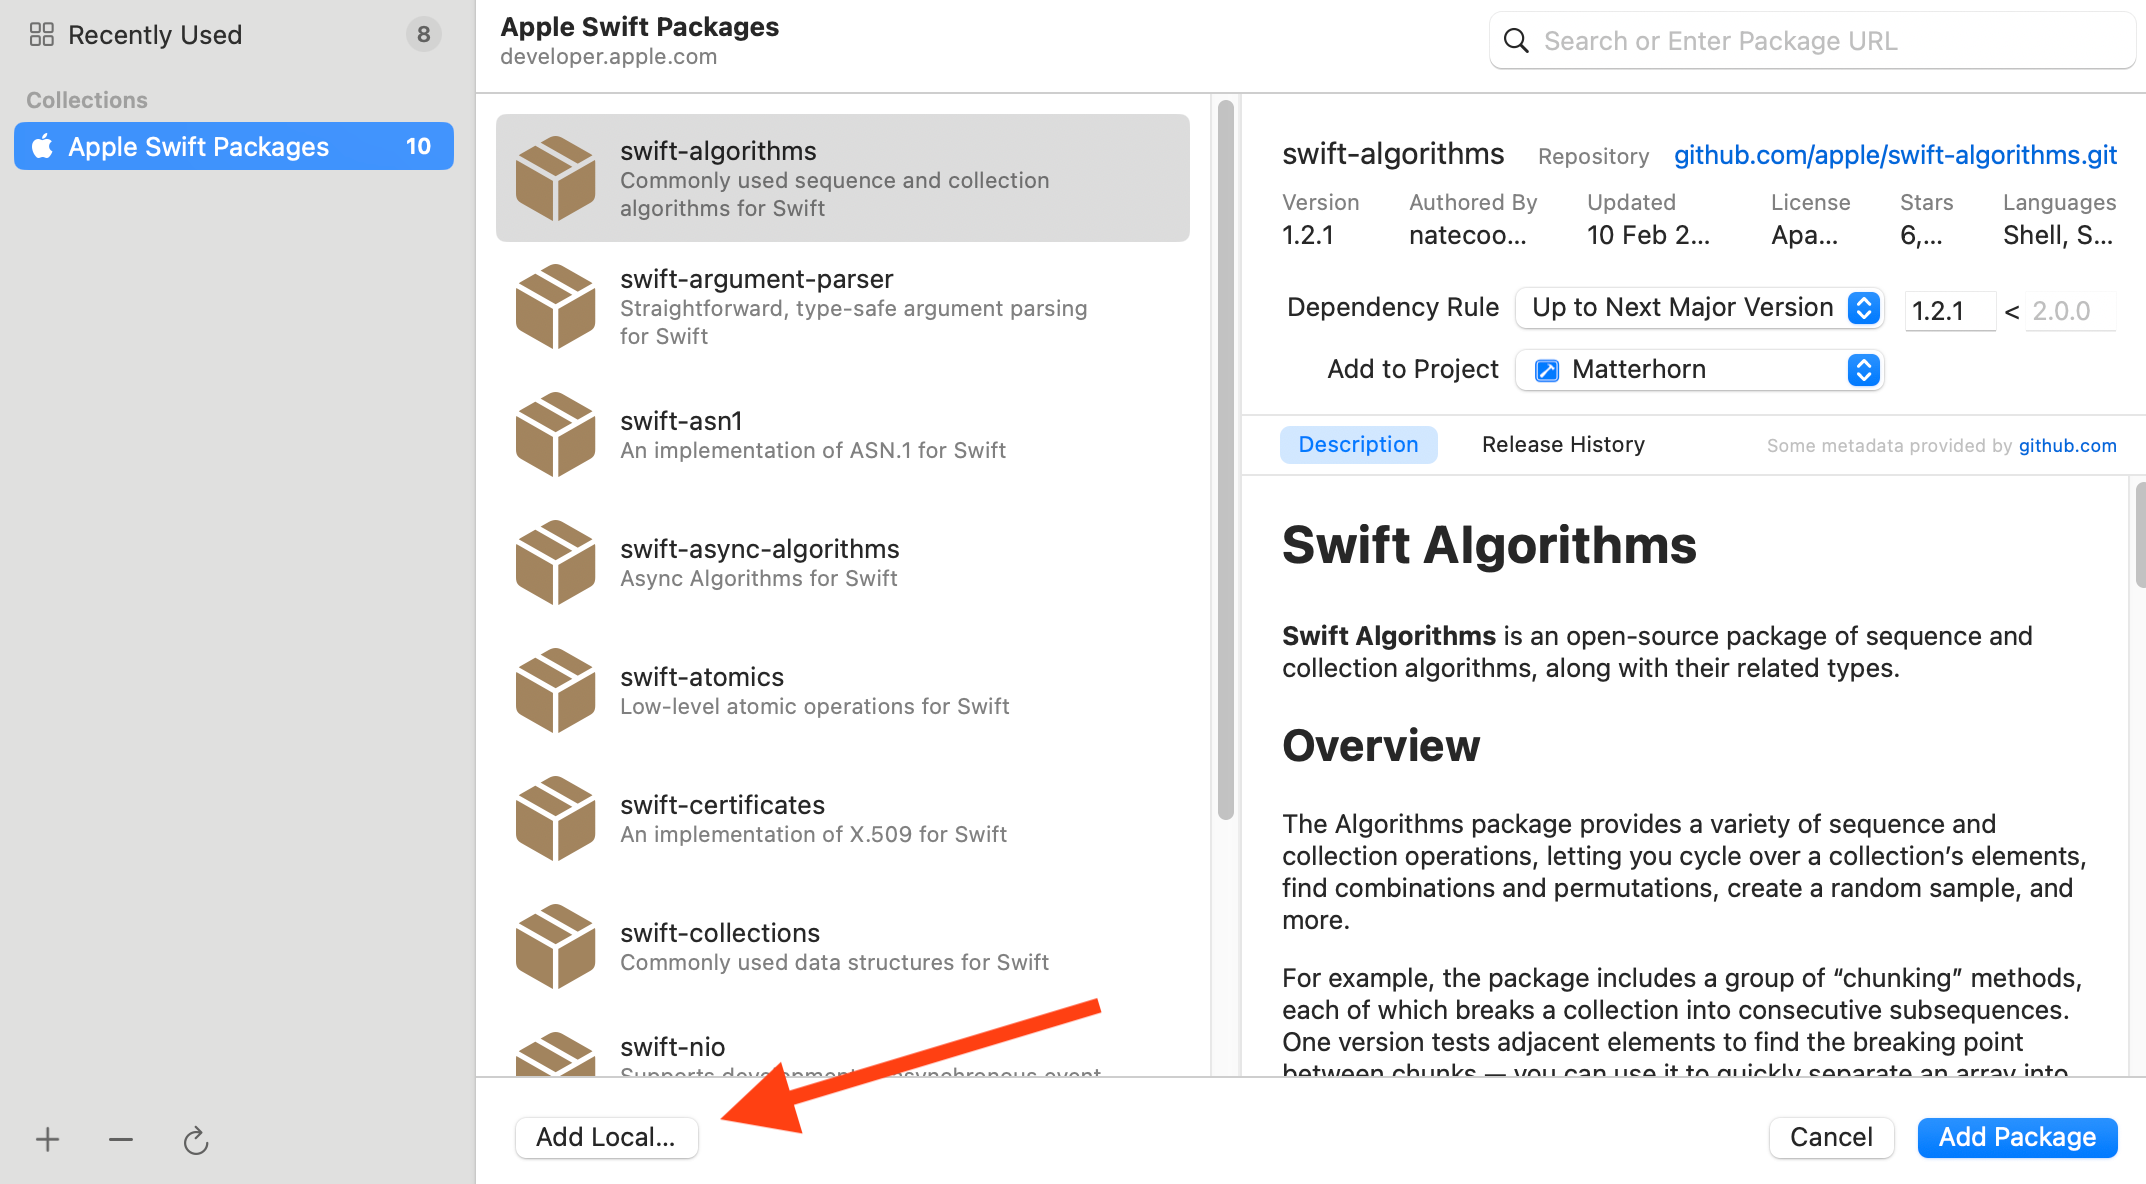
Go to File → Add Package Dependencies Click “Add Local” and point to the swiftzerland folder.
Then ensure it’s embedded:
Under General → Frameworks, Libraries, and Embedded Content, click the + button.
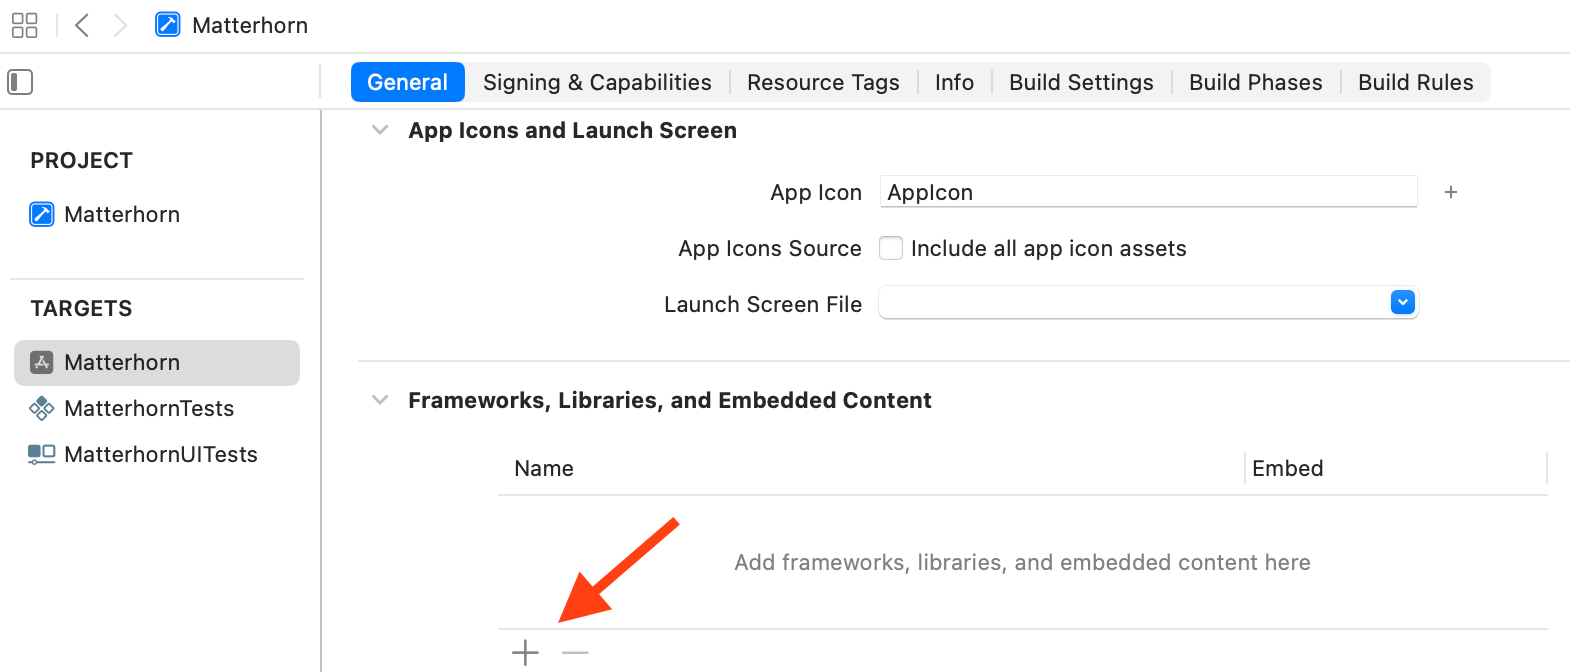
Add the Switzerland library under the Swiftzerland package.
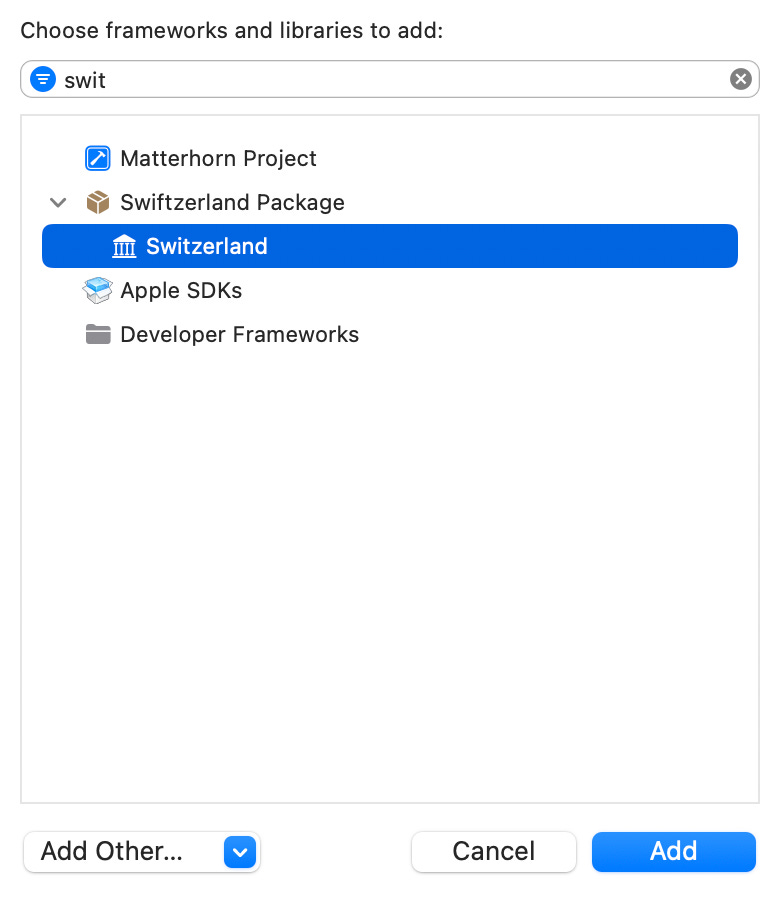
Now it’s in the list.
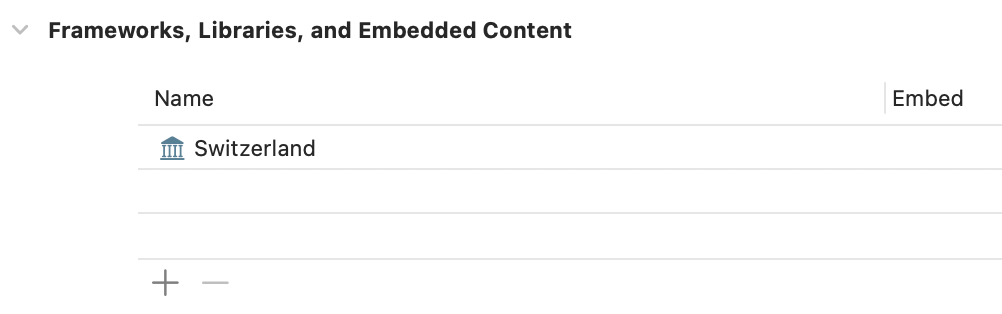
Perfect! We’re all set.
8.1. Test run
We can now import Switzerland and use our Rust code. The library is capitalized now, too.
import SwiftUI
import Switzerland // <--- We decided on the Switzerland name. If we didn’t, we could *also* import Swiftzerland.

struct ContentView: View {
    var body: some View {
        VStack {
            Text(”🇨🇭”)
            Text(neutralGreeting())
        }
          .padding()
    }
}
9. Workflow
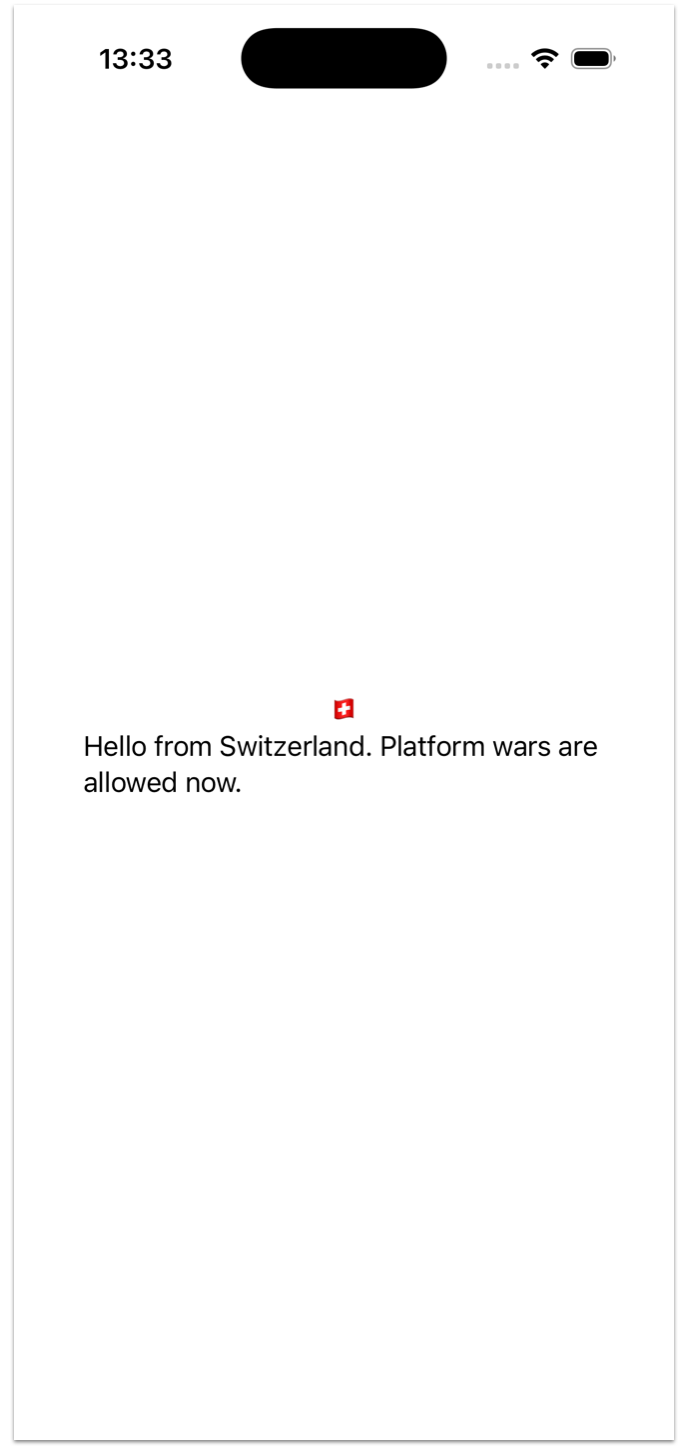
The beauty of this setup is that we can now update our Rust code, run a script (see the linked build_ios.sh) file in resources at the end), and we instantly have an iOS update!
For example, in Rust, I’ll now say that platform wars are allowed.
pub fn neutral_greeting() -> String {
    “Hello from Switzerland. Platform wars are allowed now.“.to_string()
}
I generate files, and in iOS, I see the update right away after a new build.
9.1. A slightly larger program
Of course, the path is now open for more elaborate programs.
I’ll stop here soon, but I wanted to show you how to use enums and structs. Note that you would use slightly different macros, such as uniffi::Enum and uniffi::Record for enums and structs respectively.
Also note that instead of switch, Rust uses match.
uniffi::setup_scaffolding!();

// Enum to represent the eternal debate
#[derive(uniffi::Enum, Debug)]
pub enum SuperiorPlatform {
    Swift,
    Kotlin,
    Rust, // The obvious winner
}

// A struct to hold our platform allegiance
#[derive(uniffi::Record)]
pub struct PlatformAlliance {
    pub current_favorite: SuperiorPlatform,
    pub diplomatic_message: String,
    pub smugness_level: u32, // How smug you can be about your choice
}

#[uniffi::export]
pub fn declare_superiority(platform: SuperiorPlatform) -> PlatformAlliance {
    match platform {
        SuperiorPlatform::Swift => PlatformAlliance {
            current_favorite: platform,
            diplomatic_message: “Swift is elegant, but Rust is still watching...”.to_string(),
            smugness_level: 7, // Pretty smug about that syntax sugar
        },
        SuperiorPlatform::Kotlin => PlatformAlliance {
            current_favorite: platform,
            diplomatic_message: “Kotlin is practical, but Rust remains unimpressed.”.to_string(),
            smugness_level: 5, // Moderate smugness for Java interop
        },
        SuperiorPlatform::Rust => PlatformAlliance {
            current_favorite: platform,
            diplomatic_message: “Finally, someone with sense! 🦀”.to_string(),
            smugness_level: 11, // Maximum smugness achieved
        },
    }
}

#[uniffi::export]
pub fn start_platform_war(chosen_side: SuperiorPlatform) -> PlatformAlliance {
    let alliance = declare_superiority(chosen_side);
    // Could add some war initiation logic here
    alliance
}
Now run ./build_ios.sh. The Swift Package is automatically updated, and we can use it in our Xcode project right away!
import SwiftUI
import Switzerland

struct ContentView: View {
    @State var alliance: PlatformAlliance = startPlatformWar(chosenSide: .rust)
    var body: some View {
        VStack {
            Text(”🇨🇭”)
            Text(alliance.diplomaticMessage)
        }
          .padding()
    }
}
This workflow works really well. Work in Rust → Run script → See update instantly on iOS. Experiment with it and see what you can create.
10. What we’ve accomplished
In this article, we’ve built something pretty remarkable:
A Rust library with UniFFI integration
An XCFramework that runs on both device and simulator
A proper Swift Package for clean integration
A build script that automates the entire process
Most importantly, you now have a foundation for true multiplatform development. The same Rust code can generate bindings for Kotlin, be used in Flutter, run on the web via WebAssembly, power desktop apps, and even work on IoT devices.
11. Where to go from here
This is just the beginning. Your next steps might be:
Make a real valuable Rust library
Build the Kotlin bindings for Android
Use the same Rust library for different platforms, such as command line tools, WebAssembly, or even Flutter.
Create a more substantial shared business logic layer
The foundation is there. Now you can start moving real logic into Rust and sharing it across all your platforms.
12. Build size & Compilation times
Not unimportant, but if you make a new Rust lib project, the build size (of the .a file) will be 16mb by default + another 16 for UniFFI. So using this approach will add around 32 mb to your project!
For more information to shrink the size, read this thread, and check out this page.
Also note that in the video the compilation times are long. That’s because I run cargo clean in my script which causes a fresh build, but that’s not mandatory. Without cargo clean you get faster incremental builds.
13. Resources
Check out the entire project on Github.
Enjoyed this post? Then I’m sure you’ll love my Mobile System Design book where I cover other advanced mobile topics. And consider becoming a subscriber for more.